Here are the steps to configure Azure with Devolutions Hub Business for Single Sign-on (SSO) authentication and user provisioning.
An Azure AD account with the appropriate rights is required.
Domain verification
In Devolutions Hub Business
-
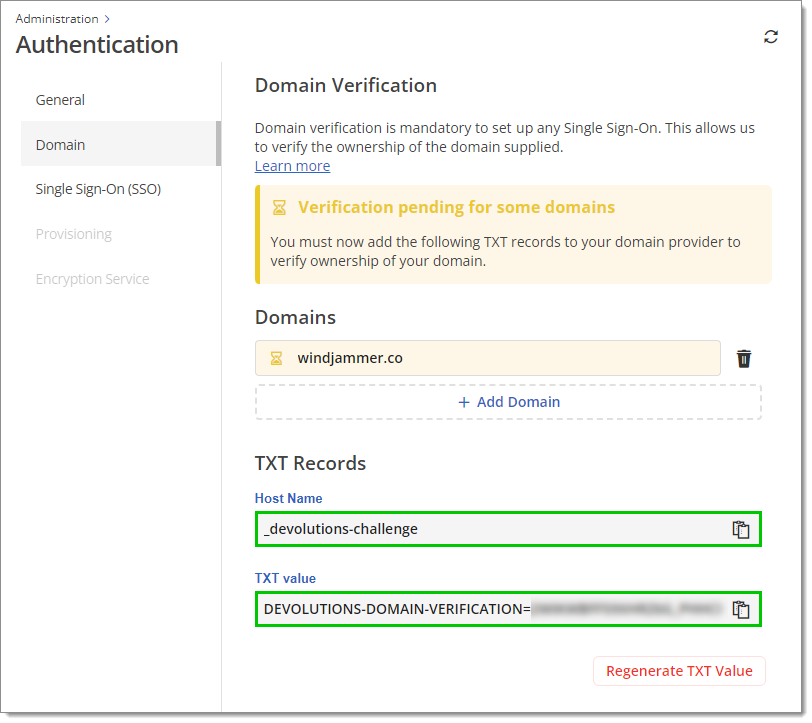
Go to Administration – Authentication – Domain, then click on Add Domain.
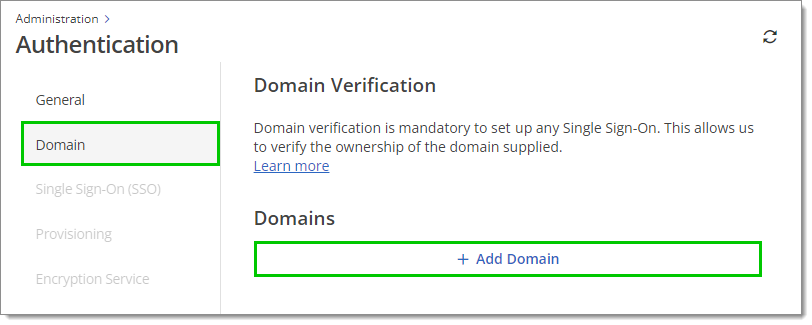
Administration – Authentication – Domain – Add domain -
Fill in your domain, then click on the checkmark to start the verification process.
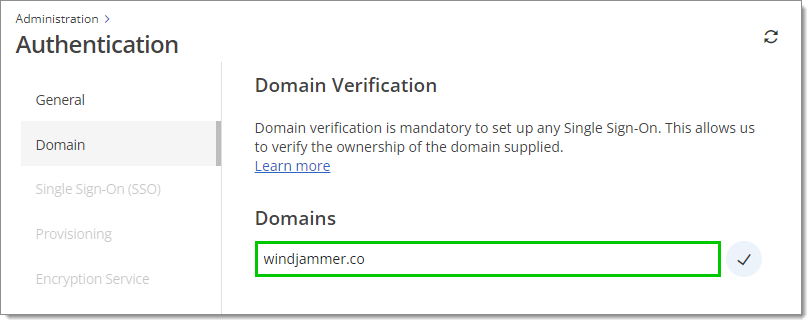
Domain -
To have multiple domains, click Add Domain once again, fill in your other domain, then click on the checkmark. Repeat this process for every domain you wish to add.
Multiple domains -
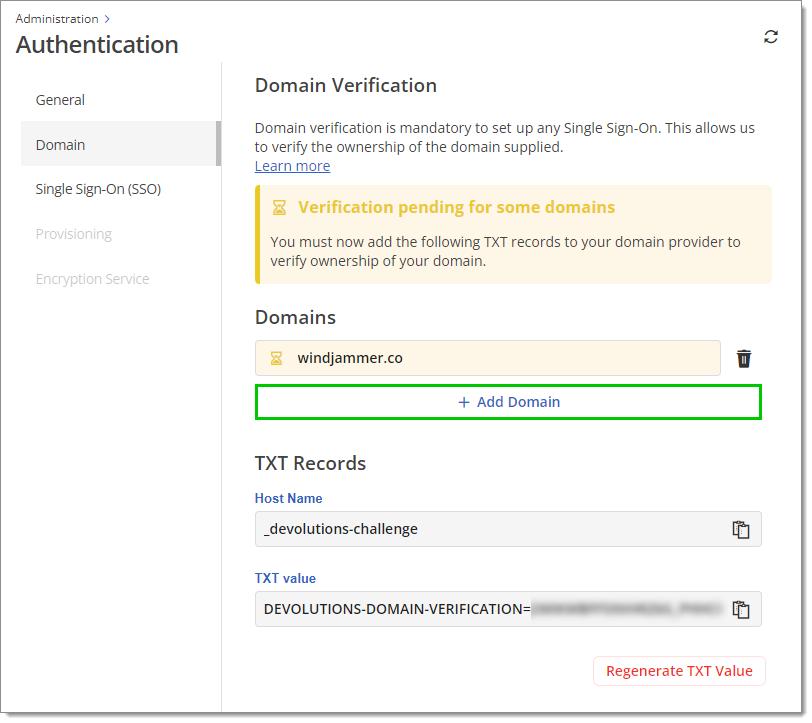
Create a DNS TXT Record using the provided Host name and TXT value. This allows us to verify the ownership of the domain(s) supplied.
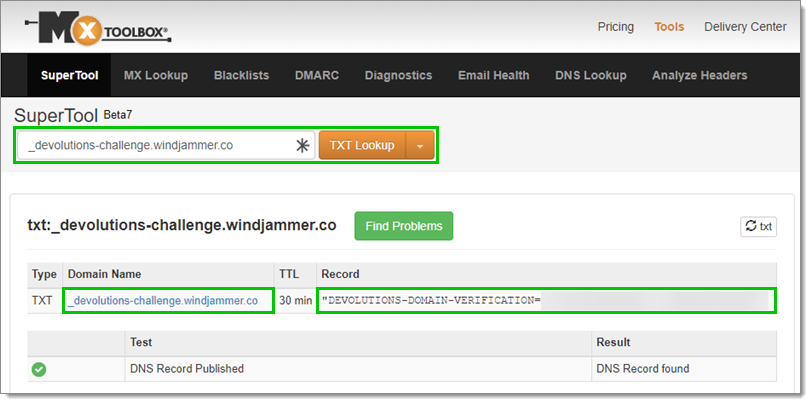
Host name and TXT value We recommend that you verify that your configuration is adequate through DNS querying tools such as MXToolBox or whatsmydns.net. The example below uses MXToolBox's TXT Lookup tool. The first part of the Domain Name must match the Host name in Devolutions Hub and the Record must match the TXT value in Devolutions Hub as well.
DNS TXT Records can take a while to propagate.
DNS TXT Record in MXToolBox -
Await domain verification. Upon successful verification, a checkmark within a green circle will display next to the domain. You may proceed to configure Single Sign-On (SSO) during the verification process; however, user provisioning will become accessible only after the domain has been verified.
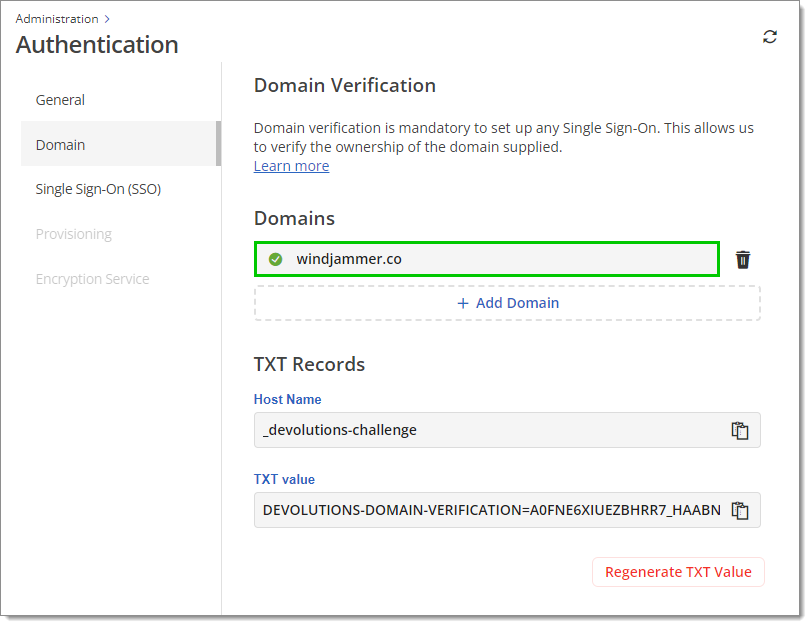
Verified domain This validation lasts for 48 hours and does not restart automatically after that period. If you do not configure your TXT record within those 48 hours, your validation status will be Expired. If that happens, you can click on Retry.
If you experience any issues while trying to verify your domain, visit our Domain validation troubleshooting guide.
Single Sign-On (SSO) configuration
-
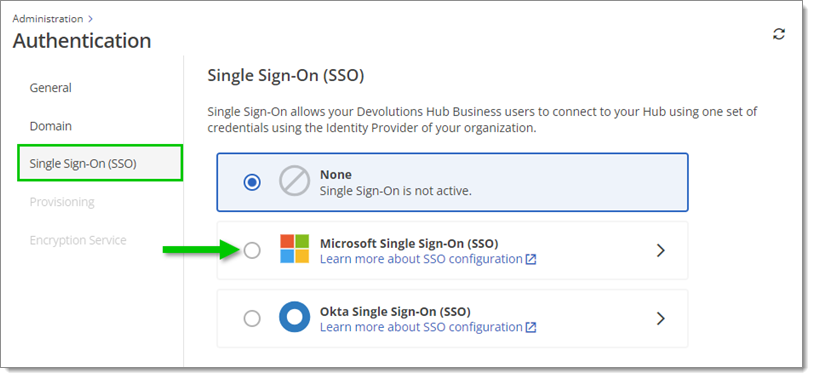
Go to Administration – Authentication – Single Sign-On (SSO), then click on Microsoft Single Sign-On (SSO). You will be directed to the configuration page.
Administration – Authentication – Single Sign-On (SSO) – Microsoft Single Sign-On (SSO) -
Name your SSO configuration. This name will only appear in your Devolutions Hub SSO settings menu. The default name is "Microsoft".

Configuration Name Do not close this setup page, as the following steps will show you where to find the information to enter in its fields.
In the Azure Portal
-
In a new web browser page, open your Microsoft Azure Portal and sign in to your account.
-
Select Microsoft Entra ID (formerly Azure Active Directory) in the Azure services section. If you do not see it, click on More services to make other services appear.
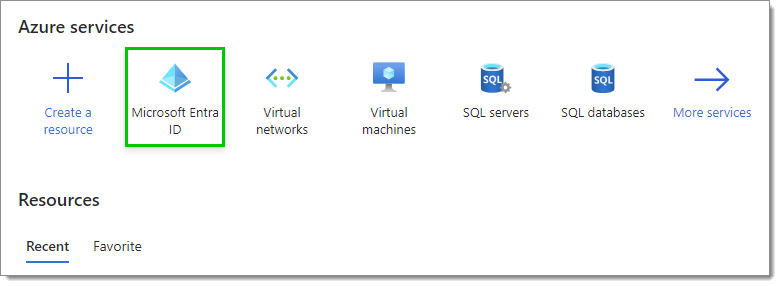
Microsoft Entra ID Service -
In Overview, click Add, then select Enterprise application.
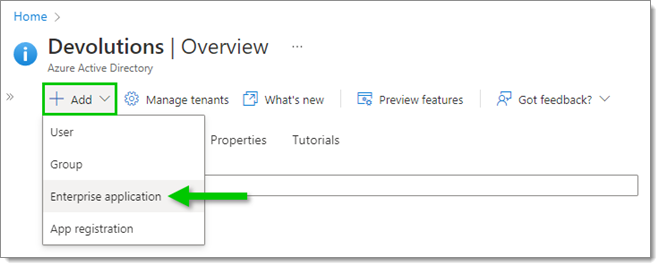
Add an Enterprise application -
Click on Create your own application.
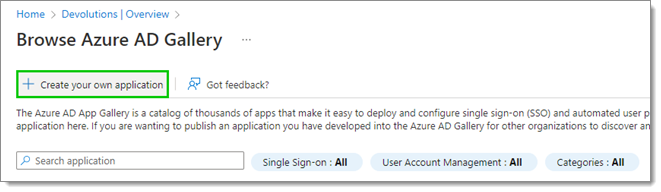
Create your own application -
Enter the name of this new application, then click on Create.
We recommend including either "Devolutions" or "Hub" in the name.
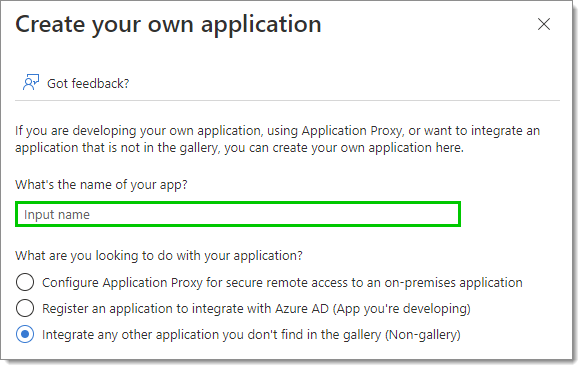
Application Name -
In the Properties, set the Assignment required? setting as needed. To learn more about this setting, hover over the information icon next to it with your cursor.
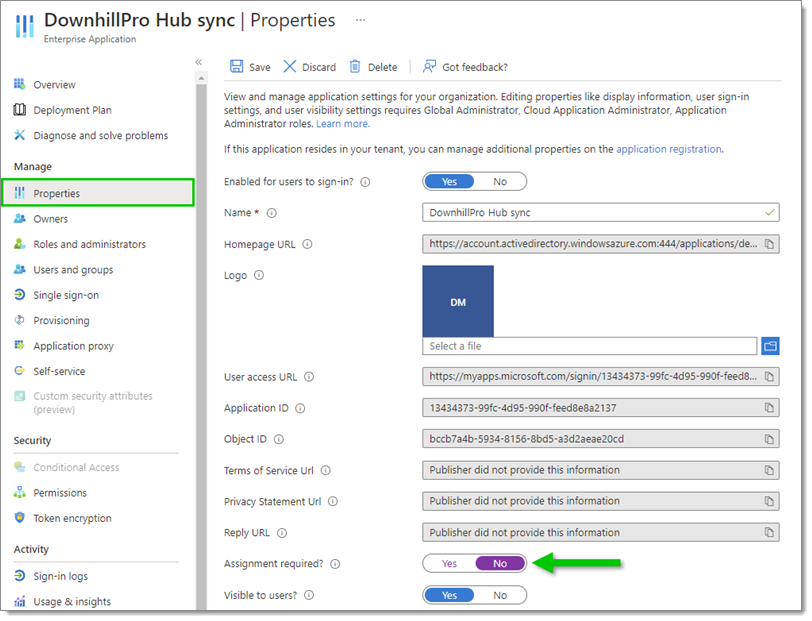
Properties – Assignment required -
Save your changes if applicable using the Save button at the top.
-
Staying in Properties, click on application registration in the text at the top.
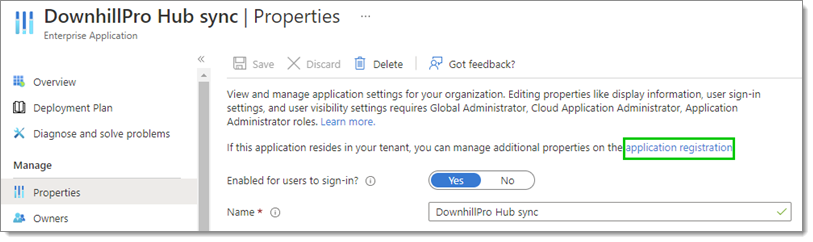
Properties – application registration -
Select Authentication in the left side menu, then click on Add a platform.
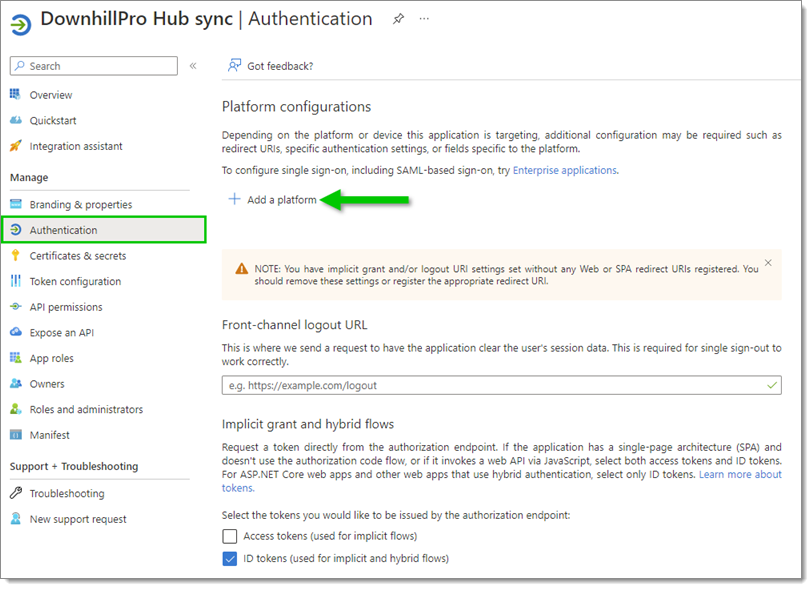
Authentication – Add a platform -
In Configure platforms, select Web.
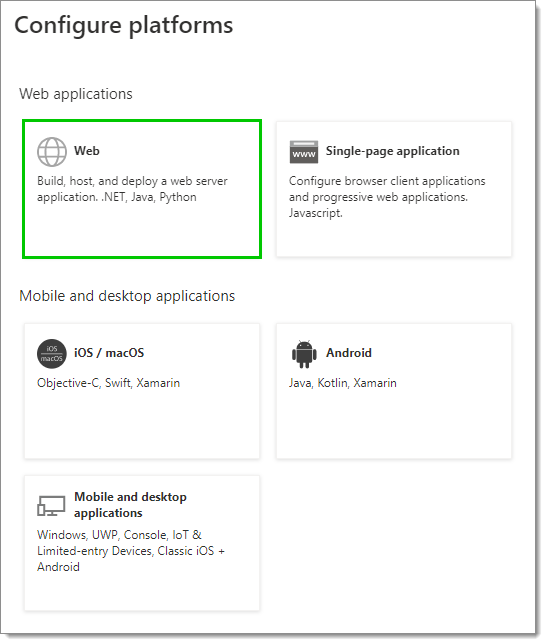
Configure platforms – Web
In Devolutions Hub Business
- Back on the Configure Single Sign-On (SSO) page, copy the Callback URL by clicking on the Copy to Clipboard icon next to it.
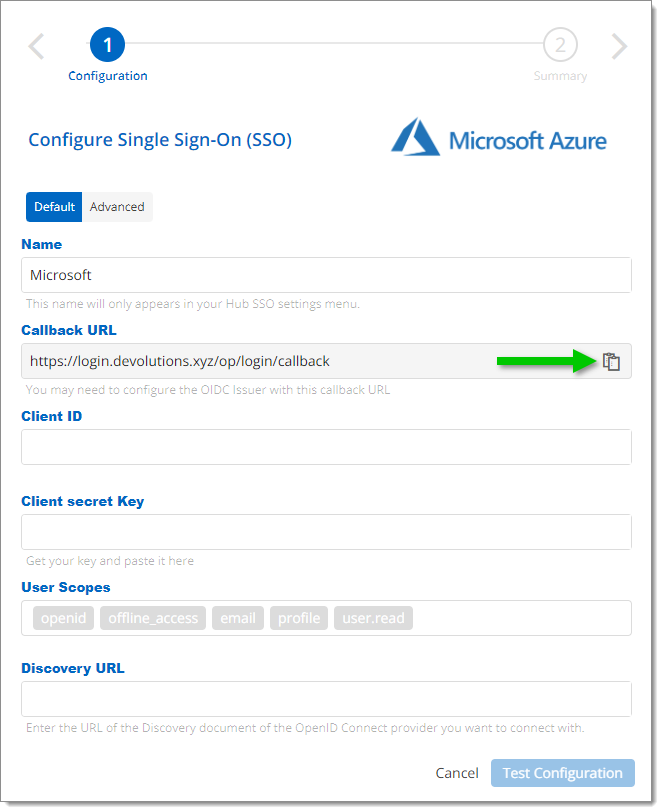
Copy the Callback URL
In the Azure Portal
- Back in the Azure Portal, paste the Callback URL in the Redirect URIs field, then click Configure at the bottom.
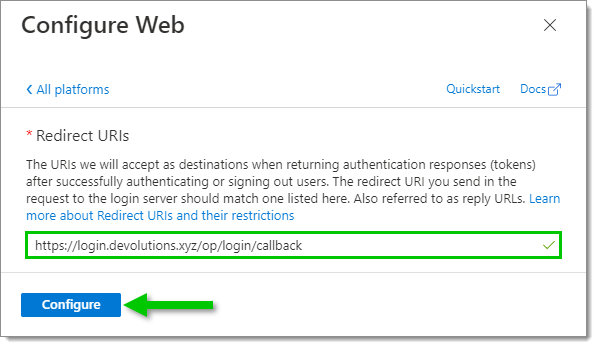
Redirect URIs - Select Token configuration in the left side menu, then click on Add optional claim.
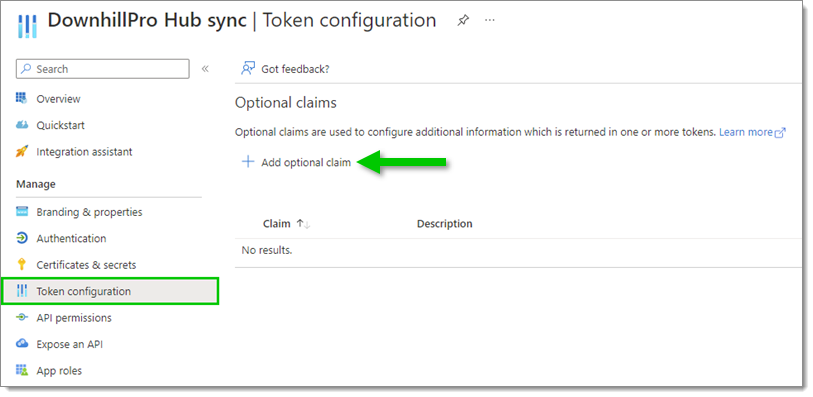
Token configuration – Add optional claim - Under Token type, select ID. Then, in the list, select the following claims:
- family_name
- given_name
- upn
- xms_pl
- xms_tpl
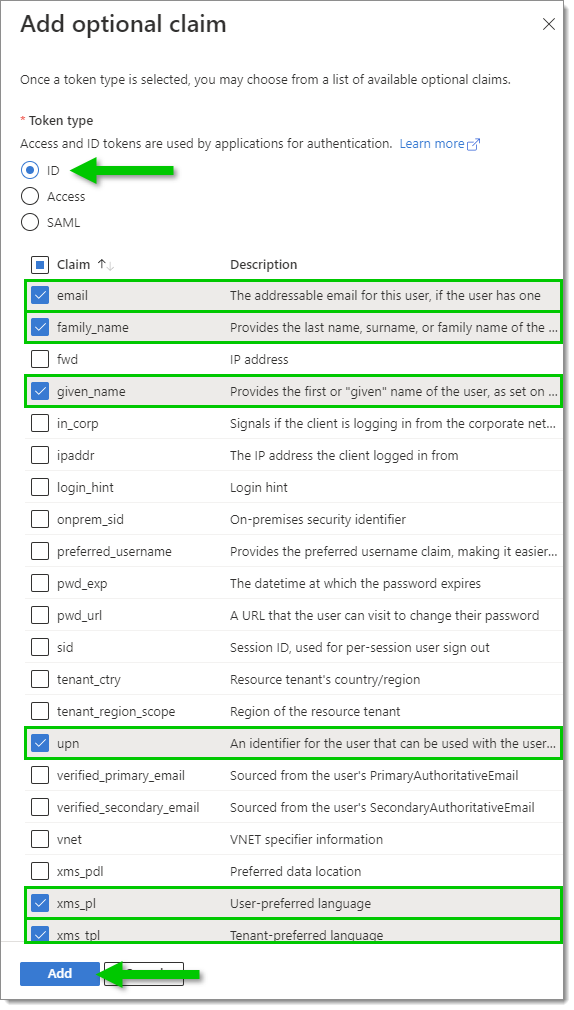
- Click Add.
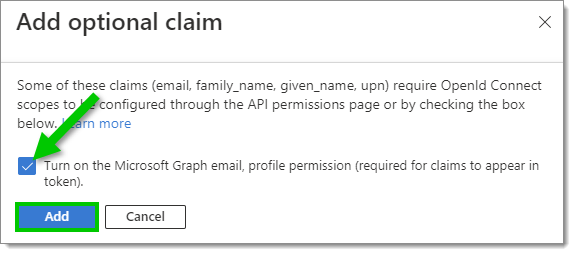
- When prompted, enable Turn on the Microsoft Graph email, then click Add.
Turn on the Microsoft Graph email - Select Overview in the left side menu, then copy the Application (client) ID by clicking on the Copy to clipboard icon next to it.
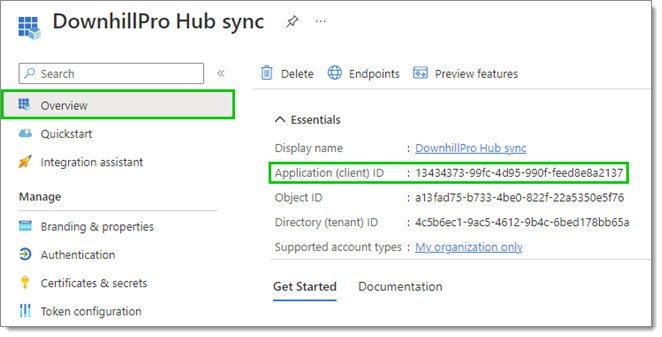
Copy the Application (client) ID
In Devolutions Hub Business
- Back on the Configure Single Sign-On (SSO) page, paste the Application (client) ID from the last step in the Client ID field.
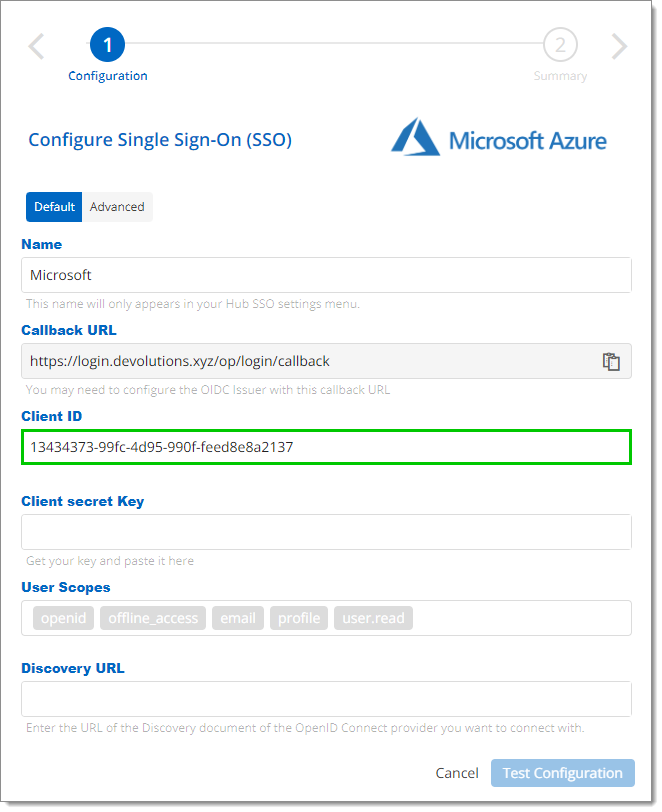
Client ID
In the Azure Portal
-
Back in the Azure Portal, select Certificates & secrets in the left side menu, then, in the Client secrets tab, click on New client secret.
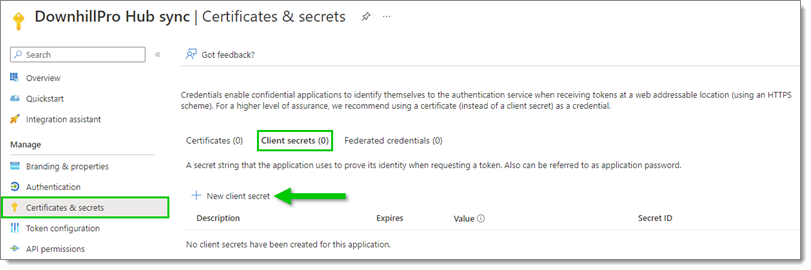
Certificates & secrets – Client secrets – New client secret -
In the Add a client secret window, enter a Description (for example, the name of your Enterprise app) and select an expiration date for this client secret, as per your best internal security practices.
Note that when the client secret expires, no one will be able to connect to the associated hub. You will then need to create a new client secret. We recommend that you set yourself a task reminder before the expiration date.
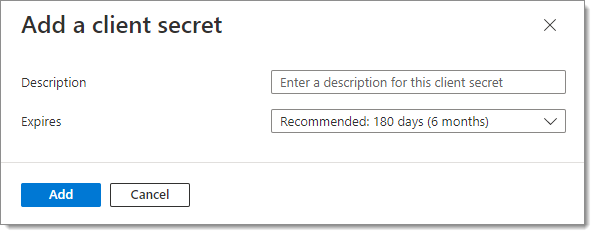
Add a client secret -
Click Add.
-
Copy the Value of this new client secret by clicking on the Copy to clipboard icon next to it.
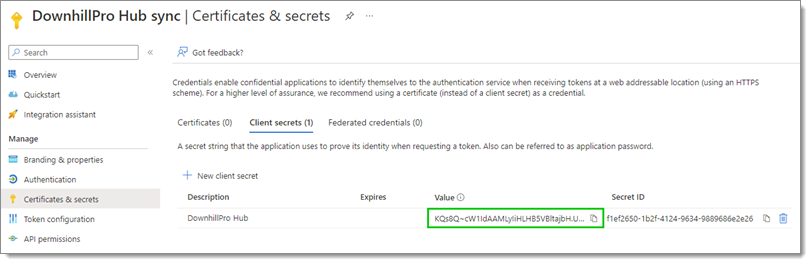
Copy the client secret value
In Devolutions Hub Business
- Back on the Configure Single Sign-On (SSO) page, paste the client secret Value from the last step in the Client secret Key field.
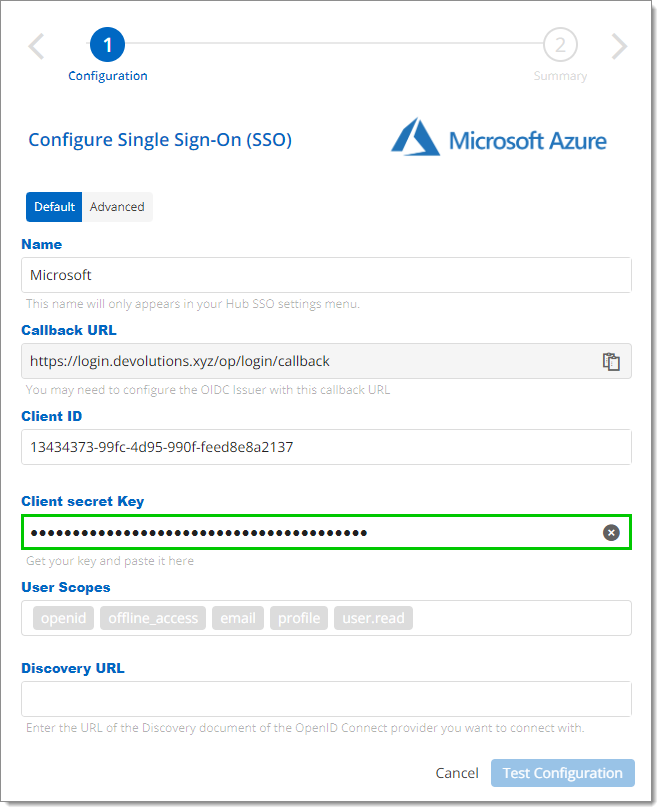
Client secret Key
In the Azure Portal
- Back in the Azure Portal, select Overview in the left side menu, then click on the Endpoints tab.
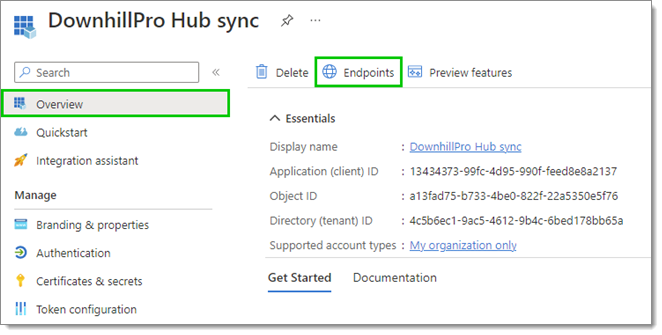
Overview – Endpoints - In the Endpoints window, copy the OpenID Connect metadata document URL by clicking on the Copy to clipboard icon next to it.
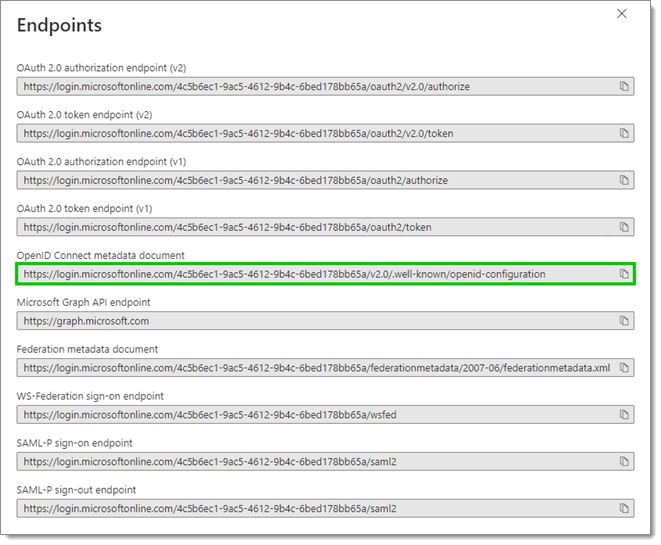
Copy the OpenID Connect metadata document URL
In Devolutions Hub Business
-
Back on the Configure Single Sign-On (SSO) page, paste the URL from the last step in the Discovery URL field.
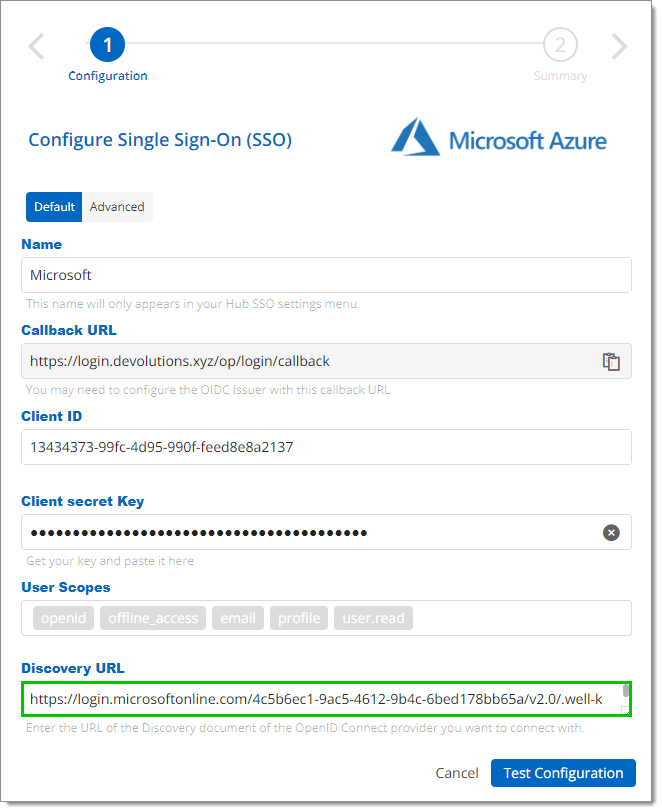
Discovery URL -
Click on Test Configuration to make sure it is correct. You will be prompted by a popup window to enter your login credentials.
If the popup page does not appear, see Devolutions login page does not open in the browser.
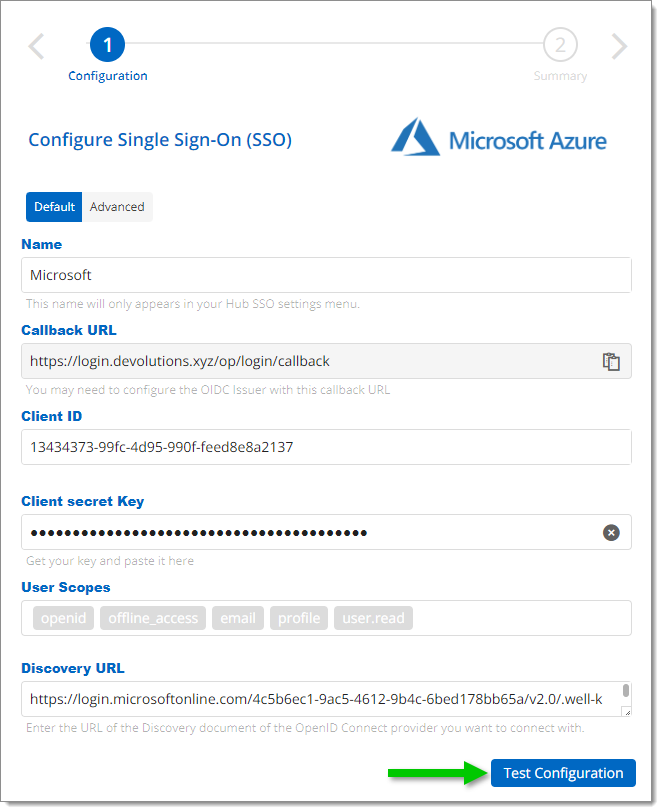
Test Configuration -
If the connection is successful, your account will connect with Entra ID (formerly Azure AD) and you will see a summary of your configuration.
-
In the Summary of your configuration, click Save.
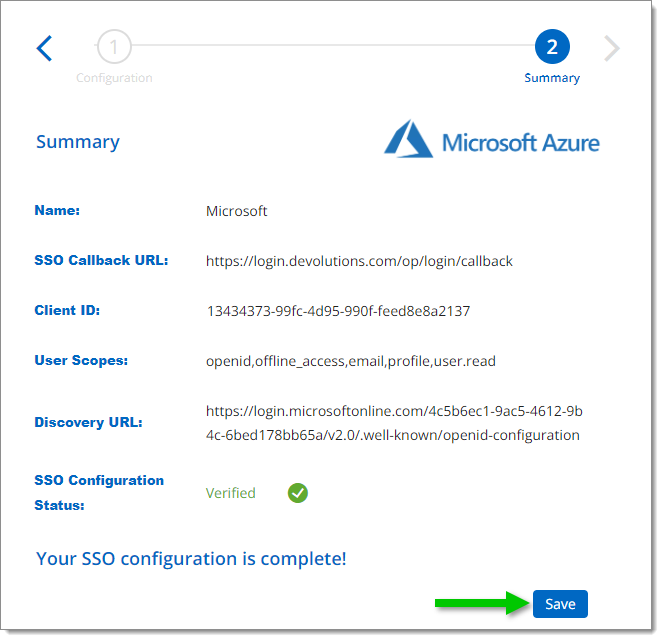
Save your configuration
Provisioning configuration
The domain verification must be completed to be able to configure provisioning.
To synchronize your users and user groups from your providers to the hub, first add your users and groups to your enterprise application. You need to have an Azure Enterprise license to be able to synchronize user groups.
Nested groups are not supported, meaning that Azure provisioning will not synchronize the users member of the nested group.
In the Azure Portal
- Select Users and groups in the left side menu, then click Add user/group.
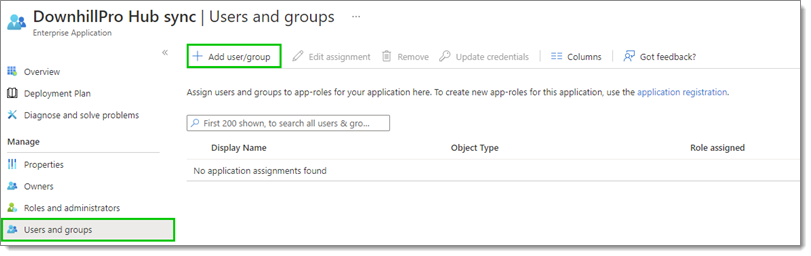
Users and groups – Add user/group - Under Add Assignment, click on None selected.
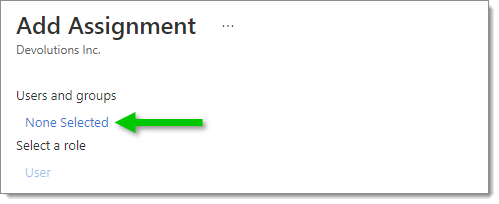
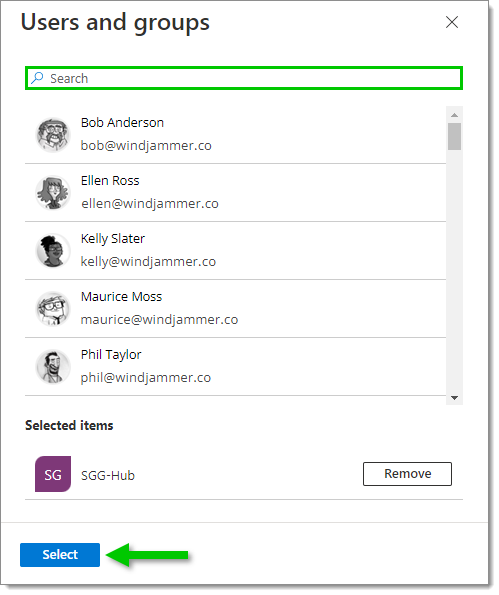
Add Assignment - Manually search for users and groups or use the Search bar. Click on Select when you have finished your selection.
Users and groups selection - Click Assign when your selection is complete.
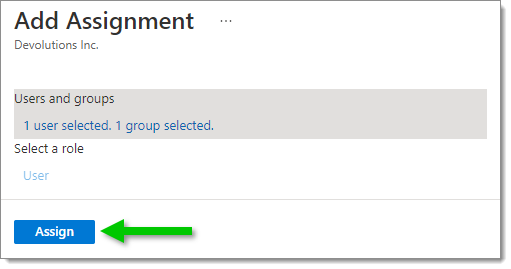
Assign users and groups
Now that your users and groups have been added, continue with the provisioning configuration.
- In the management of your Enterprise app, go to Provisioning and click on Get started.
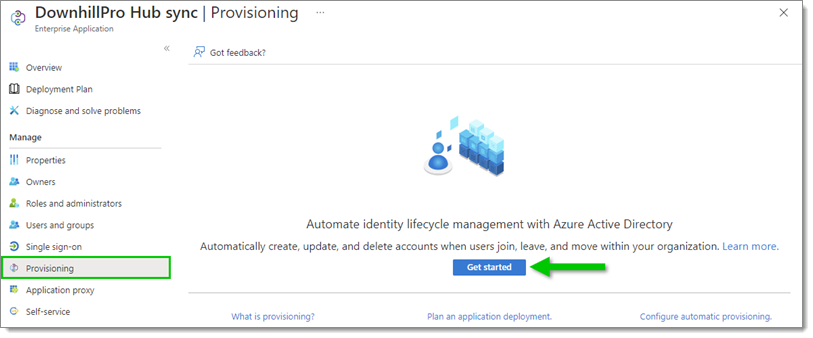
Provisioning – Get started
In Devolutions Hub Business
-
Go to Administration – Authentication – Provisioning and enable SCIM provisioning.
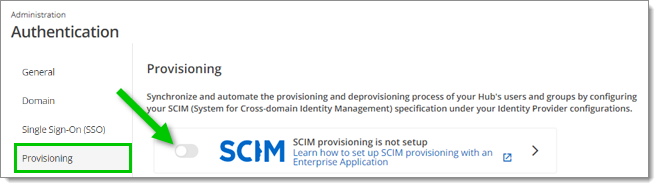
Enable SCIM provisioning -
In the Provisioning synchronization setup, copy the Tenant URL by clicking on the Copy to Clipboard icon next to it.
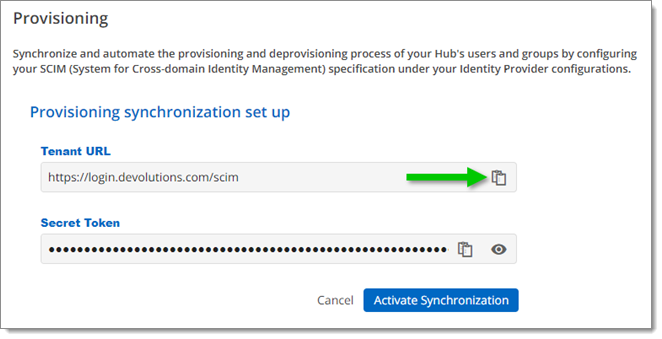
Copy the Tenant URL
In the Azure Portal
- Set the Provisioning Mode to Automatic, then paste the URL from the previous step in the Tenant URL field.
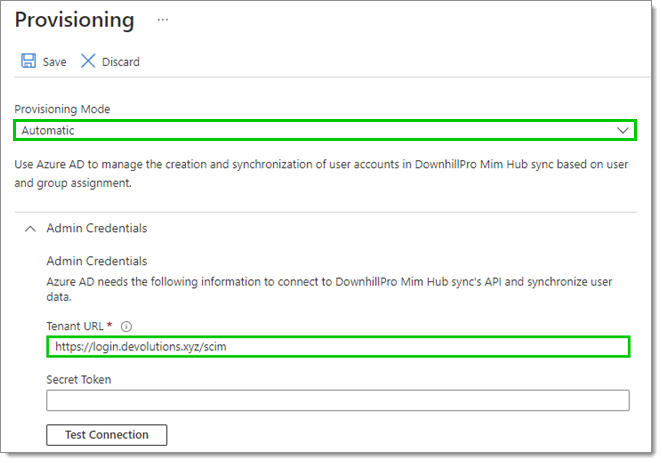
Provisioning Mode and Tenant URL
In Devolutions Hub Business
- Copy the Secret Token by clicking on the Copy to Clipboard icon next to it.
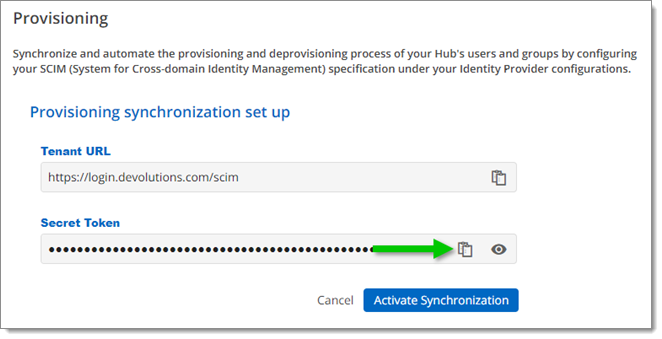
Copy the Secret Token
In the Azure Portal
- Paste the token from the previous step in the Secret Token field.
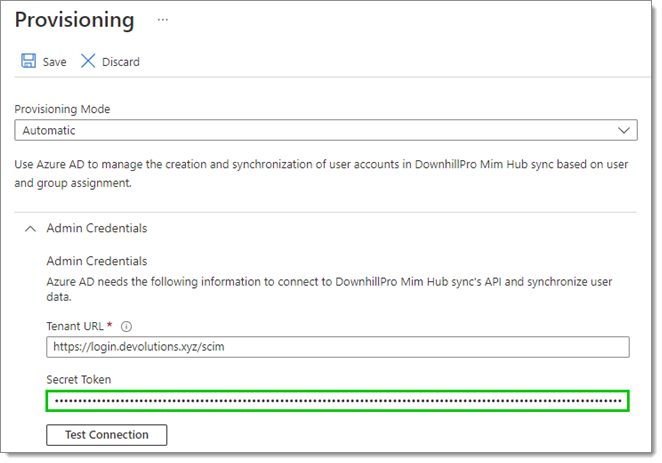
Secret Token - Test the connection to make sure that it works, then click Save.
- Select Provisioning in the left side menu, then click Start provisioning.
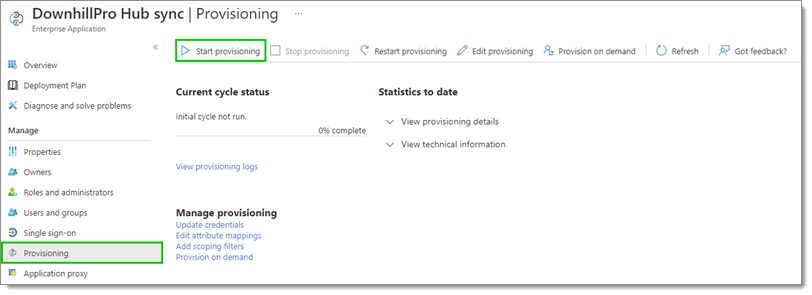
Start provisioning
In Devolutions Hub Business
- Click Activate Synchronization.
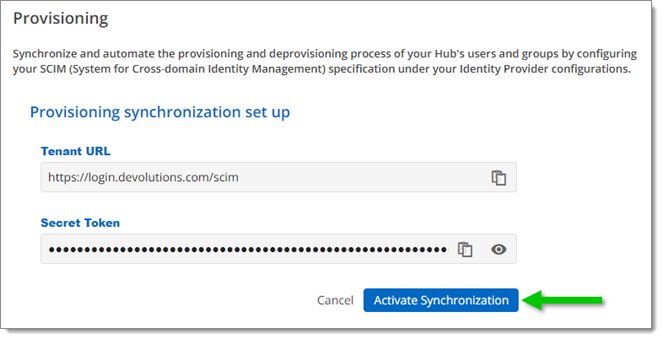
Activate Synchronization - When asked to confirm, click Start Synchronization.

Start Synchronization
You can now see an overview of your provisioning synchronization. Next to the Tenant URL, you have the options to Regenerate a SCIM Token or Delete the SCIM Provisioning.
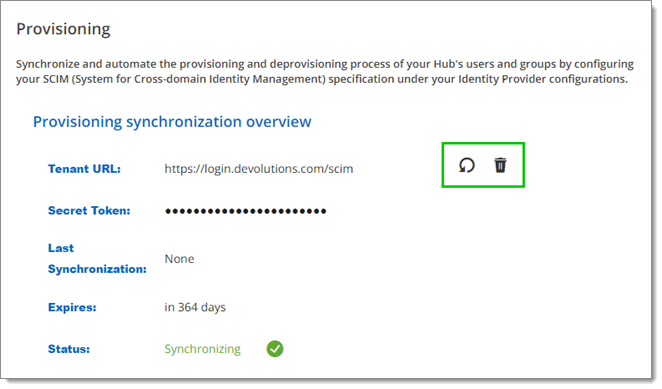
The Secret Token will expire 365 days after its generation. When it does, the provisioning will stop working. You will then need to regenerate a new token in the Provisioning synchronization overview page seen above. We recommend that you set yourself a task reminder before the expiration date.
Synchronization between Azure and Devolutions Hub
The synchronization starts automatically when the provisioning configuration is complete. Azure's provisioning frequency is at most 45 minutes and is determined by your Identity Provider. The user groups, including their members, will synchronize within this Azure provisioning time. We recommend that you to verify the first provisioning results.
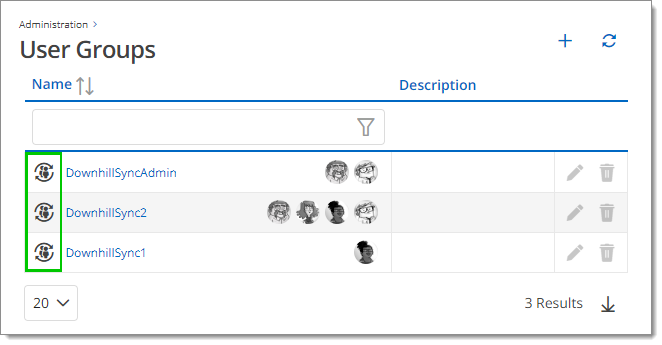
In Administration – User Groups, the Azure user groups will be added. They are recognizable by the Is sync group icon next to the group name.
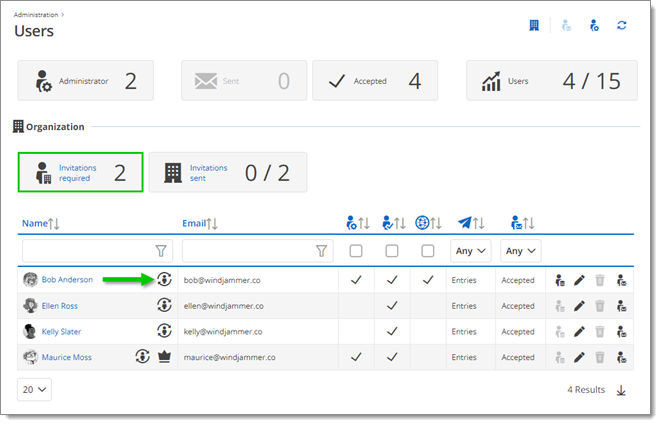
In Administration – Users, all users in the Azure user group who are already part of your Devolutions Hub will be flagged as synced with the Is sync icon next to their name. All new users part of the synchronized Azure user group who are not part of the Devolutions Hub will be suggested as new invitations in Invitations required.
All users who already had a Devolutions Account will see both login options: the Devolutions Account method and the Microsoft method.